After moving away from Google Drive to host my own cloud storage on my QNAP T-431P NAS, I started using Qsync, QNAP’s official sync client. While it works for keeping files in sync, I quickly realized something was missing: the streaming-style access I enjoyed with Google Drive. On Google Drive, I could browse my entire drive in the file manager without downloading anything until I actually opened or copied it.
Qsync, on the other hand, insists on syncing everything locally, which eats up space and takes forever on new machines. I wanted to replicate that same on-demand, seamless file access experience, but using my own self-hosted setup.
After a bit of trial and error, I found a lightweight and powerful solution using WebDAV and rclone. This guide walks through the exact steps I took to get that setup working flawlessly on CachyOS, with automatic mounting and zero syncing required.
It’s like Google Drive… but private and self-hosted.
What you’ll get:
- Encrypted access to your NAS over your LAN or Tailscale
- On-demand file browsing (streaming-style access)
- Seamless auto-mount at login or boot
- Integration with your Linux file manager
Step 1: Enable and Configure WebDAV on QNAP
First, we need to enable WebDAV on our QNAP NAS and create a shared folder.
1.1 Enable WebDAV
- Open QNAP’s web UI → Control Panel
- Go to Network & File Services > Win/Mac/NFS/WebDAV
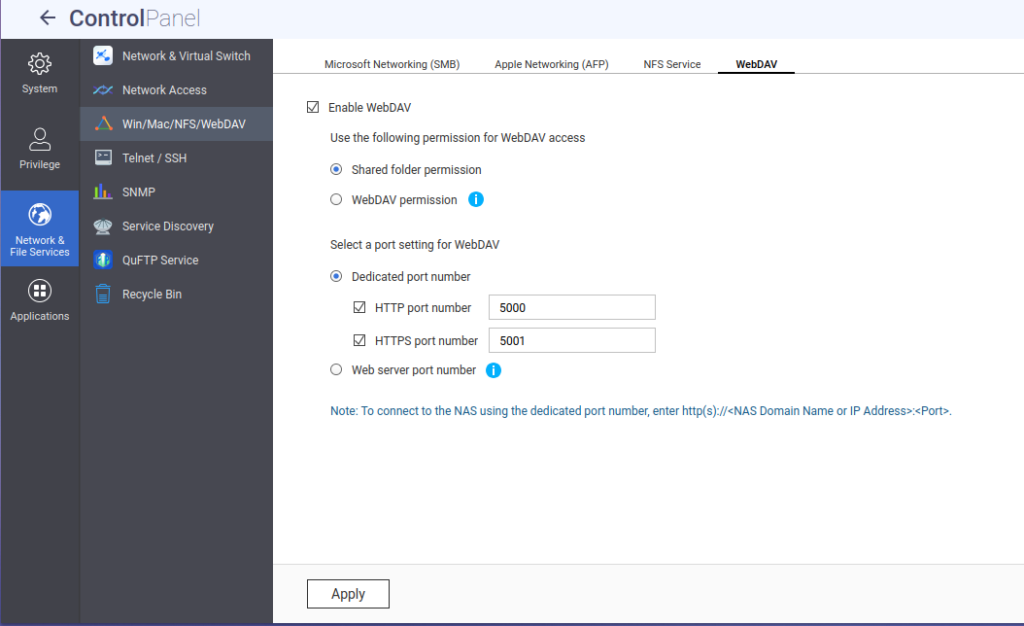
- Click the WebDAV tab
- Check Enable WebDAV
- Choose “Shared folder permission”
- Set ports (I used port 5000 for HTTP and 5001 for HTTPS)
- Click Apply
1.2 Create a Shared Folder
- Go to Control Panel > Shared Folders
- Click Create > Shared Folder
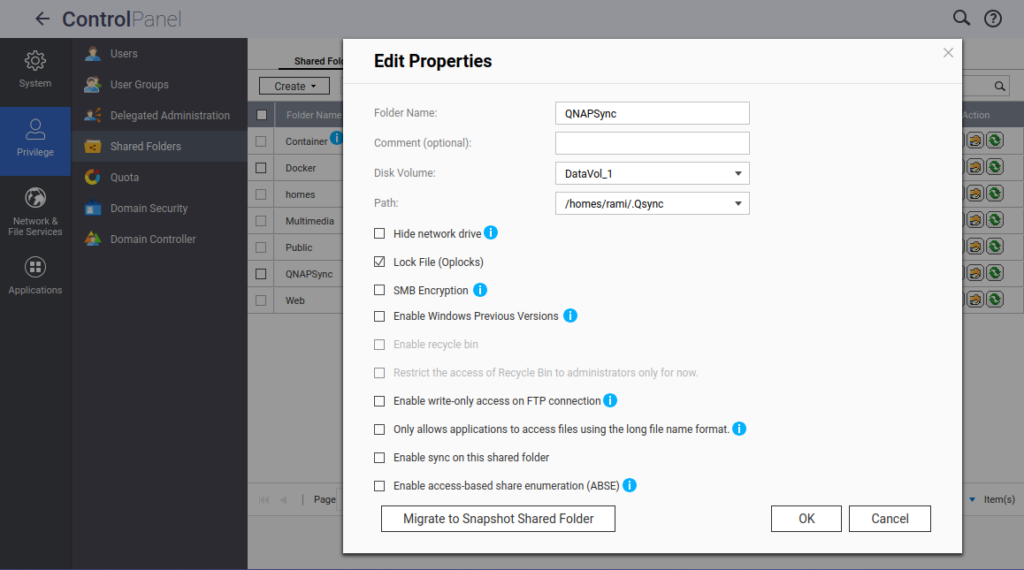
- Give it a name, for example
QNAPSync - Set the path to where your files should reside on the NAS. Since my files are already in the ~/.Qsync folder, my path is
/homes/rami/.Qsync
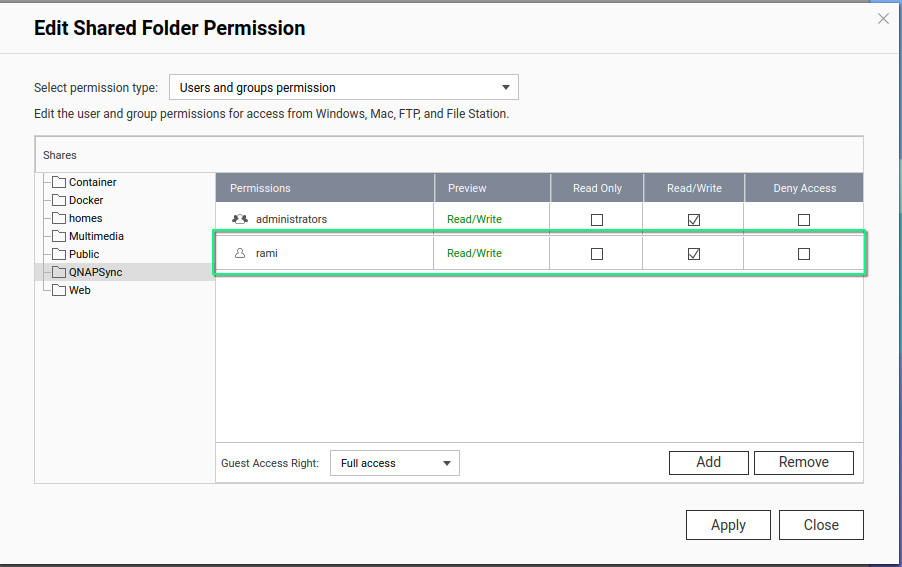
- After creating the shared folder, edit its permissions and give the active user read/write access
1.3 (Optional) Use Tailscale for Secure Remote Access
If you want to access your NAS remotely, from another computer, your phone, or a laptop outside your home, you normally need to set up port forwarding, deal with firewalls, or expose your NAS to the internet, which is risky.
With Tailscale, you can skip all of that. It creates a secure private mesh network between your devices using WireGuard, meaning you can access your NAS from anywhere, as if it were on your local network without any port forwarding.
On my QNAP T-431P, the Tailscale app is not available via the App Center, so I installed its container using QNAP’s Container Station.
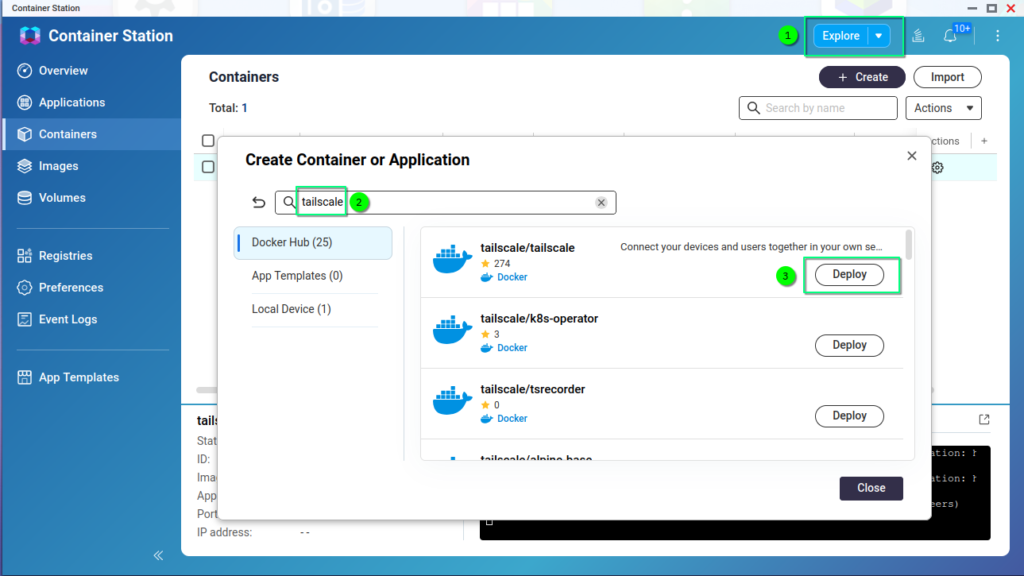
When creating the application, make sure to set the Network Type to host and follow the authentication link in the log to connect your NAS to the private network.
Once connected, your NAS will get a Tailscale IP (e.g., 100.115.92.14) and MagicDNS name, like nas.tailnet123.ts.net.
Step 2 (Optional): Set Up Tailscale on your Linux machine
Install Tailscale:
yay -S TailscaleStart and enable the Tailscale service:
sudo systemctl enable --now tailscaled
sudo tailscale up
Then log in with the same Tailscale account used on your NAS.
Step 3: Set Up Rclone
Now that your QNAP NAS is exposing your shared folder via WebDAV, it’s time to set up your Linux system to connect to it using rclone.
3.1 Install Packages
Open your terminal and run:
yay -S rclone fuse33.2 Configure the WebDAV Remote
Next, we’re going to define a “remote”, which is rclone’s term for any cloud/remote storage location.
Run the interactive setup:
rclone config- Select
nfor new remote - Name it:
qnap(or anything memorable likenasorcloud) - Storage type:
webdav - WebDAV type:
Other - URL. Use either:
https://(ip address on LAN):5001/QNAPSync(for LAN access)- or
https://(Tailscale MagicDNS name):5001/QNAPSync(for Tailscale access, in case you followed the optional steps above)
- Enter your NAS login credentials
- Confirm and save
You should now see your new remote listed, like:
Current remotes:
Name                 Type
====                 ====
qnap                 webdav
Before going further, let’s make sure the remote is working:
rclone ls qnap:
If you see an error like 403 Forbidden, double-check:
- Your username/password
- That WebDAV is enabled for the folder on QNAP
- That you’re using the correct URL and port
3.3 Testing rclone configuration: Manually Mount
Let’s mount the remote share to a local folder:
mkdir -p ~/QNAPDrive
rclone mount qnap: ~/QNAPDrive --vfs-cache-mode writes
Leave this terminal open while it’s mounted — it’s a foreground process.
You can now:
- Open
~/QNAPDrivein your file manager - Browse, copy, and open files
- Stream media or documents without syncing everything
Step 4: Auto-Mount at Boot with systemd
Mounting your QNAP NAS manually works, but who wants to do that every time they reboot or log in? Let’s automate the process so that your NAS share is always available as a mounted folder.
We’ll do this using systemd, the powerful init system used by Arch and most modern Linux distributions.
4.1 Create a Mount Script
First, create a small shell script that runs the rclone mount command, and includes logic to clean up old mounts if needed.
mkdir -p ~/.local/bin
nano ~/.local/bin/rclone-qnap-mount.sh
Paste this:
#!/bin/bash

LOGFILE="/tmp/rclone-debug.log"
MOUNTPOINT="$HOME/QNAPDrive"
CONFIG="$HOME/.config/rclone/rclone.conf"
REMOTE="qnap:"

{
  echo "[$(date)] Mounting WebDAV..."

  mkdir -p "$MOUNTPOINT"

  # If already mounted, unmount first
  if mountpoint -q "$MOUNTPOINT"; then
    echo "Already mounted. Unmounting..."
    fusermount3 -u "$MOUNTPOINT"
    sleep 2
  fi

  /usr/bin/rclone mount "$REMOTE" "$MOUNTPOINT" \
    --vfs-cache-mode writes \
    --allow-other \
    --config "$CONFIG"

  echo "[$(date)] Mount ended or failed."
} >> "$LOGFILE" 2>&1
Then make the script executable:
chmod +x ~/.local/bin/rclone-qnap-mount.sh4.2 Create the systemd User Service
Now let’s create a user-level systemd service that runs the mount script when you log in or when your system boots (even before login, if desired).
mkdir -p ~/.config/systemd/user
nano ~/.config/systemd/user/rclone-qnap.service
Paste this:
[Unit]
Description=Mount QNAP WebDAV via rclone script
After=network-online.target
Wants=network-online.target

[Service]
Type=simple
ExecStart=%h/.local/bin/rclone-qnap-mount.sh
Restart=on-failure
RestartSec=10

[Install]
WantedBy=default.target
4.3 Enable “Lingering” for Auto-Start at Boot
Normally, user services only start when you log into a graphical session. To make them start at boot, we need to enable lingering:
sudo loginctl enable-linger $USERReplace $USER with the actual username.
4.4 Enable and Start the Service
Finally, activate your new service:
systemctl --user daemon-reexec
systemctl --user enable --now rclone-qnap.service
Check That It’s Working
To check if the mount is active:
systemctl --user status rclone-qnap.serviceAnd to see if the mount is live:
ls ~/QNAPDriveOn next login or reboot, your NAS should auto-mount to ~/QNAPDrive